In the Shadow of the Devil

Monday, March 19, 2007

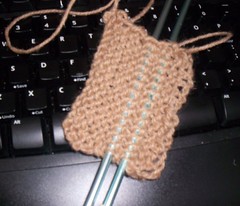
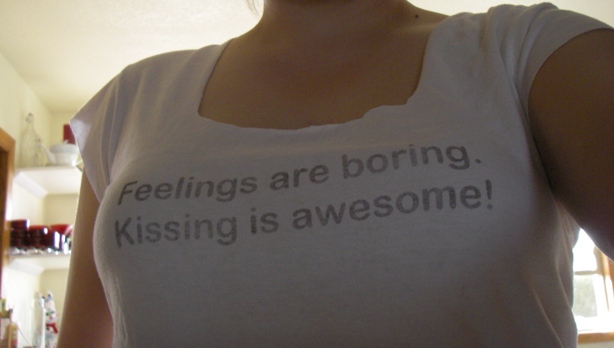
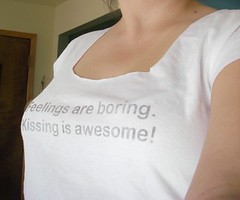
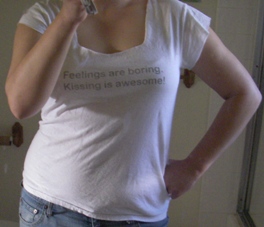
Feelings are boring. Kissing is awesome!

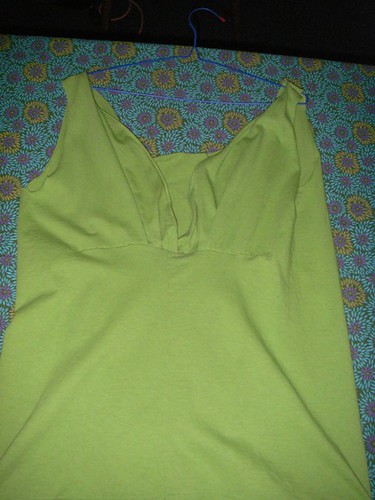
I needed a shirt to wear out on Friday night. While I wait for my sister’s improved version of this shirt, I whipped this up in about 30 minutes on Friday evening:

Feelings Are Boring TShirt

To make:

I grabbed a white undershirt out of the drawer and used a marker to guide neckline depth and width and cut that out. Since the sleeves looked like this before:

Feelings Are Boring TShirt

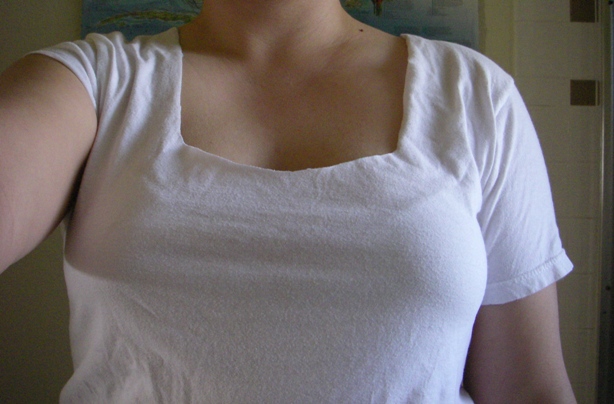
I chose to make them into cap sleeves like this:

Feelings Are Boring TShirt

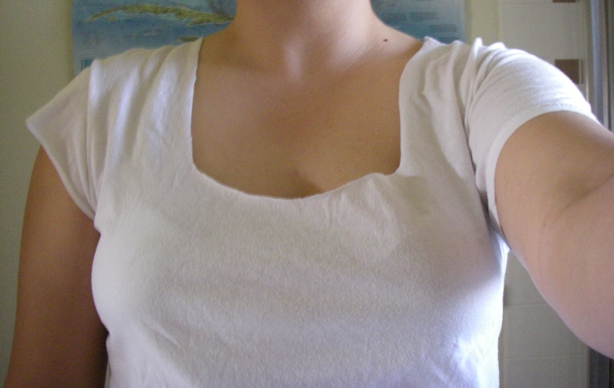
In order to make the second sleeve match the first, I took the cut-off section and tucked it around the uncut sleeve for a template:

Feelings Are Boring TShirt

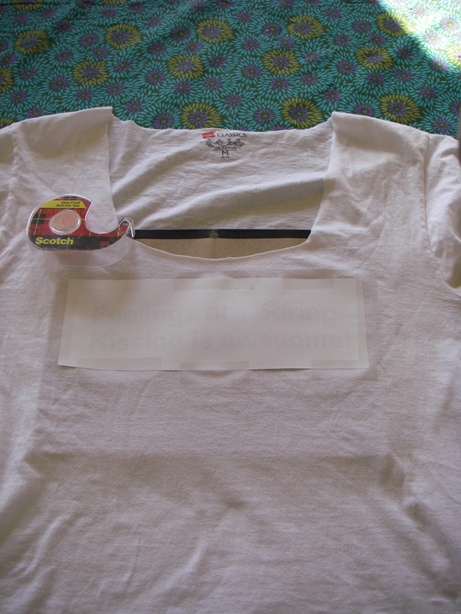
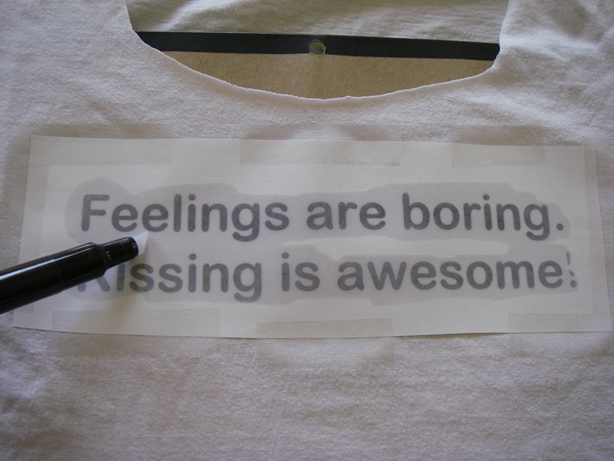
I used my laser printer to print out the text (make sure the text is reversed using the “flip” tool in most graphics programs). In order to use a blender pen to transfer images, you need to have your image printed on a laser printer (both color and black images will transfer):

Feelings Are Boring TShirt

You’ll want to fasten the image (print side down) to your fabric to prevent it from moving while you work. I used tape; I also put a pad of paper beneath the transfer area to keep any of the transferred ink from seeping all the way through to the back of the shirt:

Feelings Are Boring TShirt

Use a blender pen (you can also use wintergreen oil) to fully moisten the image area:

Feelings Are Boring TShirt

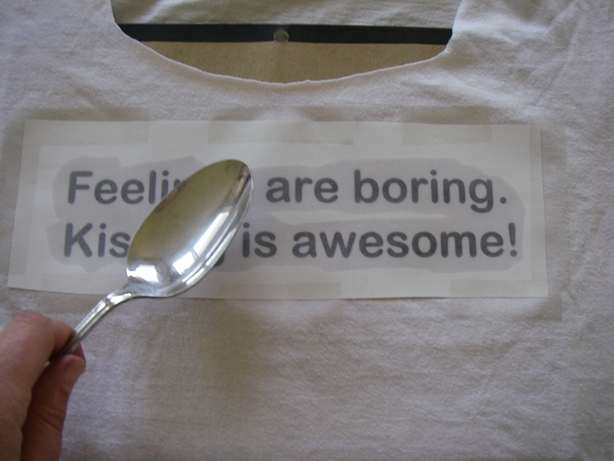
Then use the back of a spoon and rub the image area firmly to transfer the ink:

Feelings Are Boring TShirt

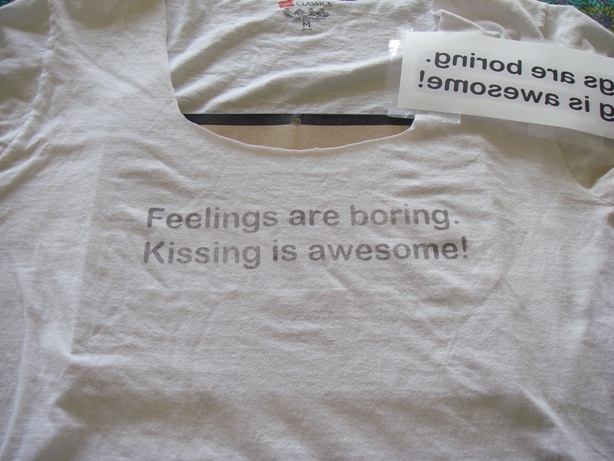
Peel back your paper and admire your craftiness (I used a little less pressure to create a more washed-out image):

Feelings Are Boring TShirt

Apply shirt. Feel both crafty and foxy. Proceed to flirt and imbibe. Cheers!

Feelings Are Boring TShirt

Feelings Are Boring TShirt

Labels:

Wednesday, February 14, 2007

FO: Capelet

In the interests of jump-starting the refashioning around here, I picked up a project that had been on the needles, languishing, since September. It’s the Anthropologie Capelet by Peony Knits. It was begun to wear over a vintage sundress to a friend’s wedding down in Malibu. As such, it’s knit from cotton yarn, which I abhor, but which I thought would be cooler. I’d tossed it into the WIP basket once I figured out I’d run out of yarn (gasp!), and wore a beaded shawl instead. With a little figuring, I adjusted the bottom edge of the capelet and had just enough yarn to get this far:

Anthropologie Capelet

A little shorter than I’d like, but at least it’s done.

Notes: This pattern is darling, and I’d really like to make one (a little snugger in the arms, a little longer) in wool, which I think would create fabric with the “memory” the capelet fronts require to look as cute as Peony’s. As for this one, it’ll get blocked and go in the closet, and I expect it’ll get occasional wear until I decide to cannibalize it (as soon as I can think of a pattern that requires cotton). I lost the ball band for the yarn, but I hate cotton, anyhow. The brooch which closes it is a piece of costume jewelery from my maternal grandmother’s collection; as girls, my mom would let us play with grandma’s costume jewelery, and I somehow managed to smuggle this brooch out of the house with me when I left home.

Also, Peony’s right: it looks better purl-side out, the texture makes it interesting:

Anthropologie Capelet

Labels:

Tuesday, February 06, 2007

Flop

As my first project as an official refashionista, I attempted the Tae-kwon-do T-Shirt reconstruction (sorry - I can't seem to even open the old wardrobe refashion blog to link) with a green tee left behind by an errant fisherman. Mayhaps the shirt was much too large (2 sizes larger than the size I might wear), but the front edges sag unattractively, and there is an interesting cowl-like upper back portion. I can't even bear to try it on for a photo.

IMGP0116a.JPG

However, I am intrigued by the construction concept, and will try again with a smaller shirt tonight (and promise to take process pics - I was too excited last night to remember to do so!)

Labels:

Steps, baby.

I've been in a fit of organization lately. First victim was the junk drawer, which might show up in a later post. Second are the kitchen cabinets. I'm most proud of the baking cabinet, which went from crammed-to-the-gills to this:
IMGP0049a.JPG
Check that, baby - that's extra space up there! Love it.

You can also see, just to the side, the texture-and-painting that's been in progress for oh...about...a year. Reason was, I wanted an orange kitchen, just not the ORANGE that it ended up being when applied. After spending a great deal of time moping about this, I tried lightening up the paint with a little eggshell, and arrived at this:
IMGP0048a.JPG
That's the too-bright mandarin orange on the left, and the just-right on the upper right. My fishing sensei has dubbed the perfect color to be "salmon roe." I'm happy with that.
(also to note: nuns-of-the-month calendar: nuns on a rollercoaster, nuns playing golf, nuns on waterski, and this month, nuns who ROCK)

Labels:

Wednesday, January 10, 2007

Get beaten with the Ugly Stick

The Ugly

Behold: The Ugly. An original Con Ugly, which fell into my possession through a rather circuitous route. Belonged a while back to a friend’s brother, whose ex-girlfriend I ran into one day on the beach. She was trying to raise gas money to get to Portland, and wanted to sell a bunch of boards he’d given her, including the Ugly. For sixty bucks, I was the new owner of four, mostly busted, boards. They hung out for a while in my garage, while I dreamt of hacking them up for patio furniture. Then my friend wanted them, and we made a trade – the boards in exchange for a moderately thrashed shortie. The boards ended up lying in the side yard for months before I asked for 2 of them back – the ugly and a Noll, both missing most of the underside glass. It was a hot commodity – I had at least four people offer me grand things in trade for it. All of them wanted to reglass it, use it. Noble, really. I wasn’t tempted, except to reglass it for myself. Then my friend’s sister wanted the Ugly, and I couldn’t say no. She said it belonged ‘in the family.’ I scraped about 15 years of what seemed like mostly beeswax and straight paraffin off of it – a 6-hour job – and polished it with an old pair of nylons. It became a birthday present to her, and she had planned to hang it in her house. It’s now holding up her garage wall. Such is life. Farewell, Ugly. You belonged to me, but were never really mine.

The Ugly

Labels:

Thursday, November 09, 2006

Knitting Surgery - Making a short piece longer

Knitting Surgery – Part 1

So…my Rogue hoodie is too short. Not too short to fit on my body, but short enough that it hits me someplace unflattering. Like somewhere between my knees and my navel. Rather than be glum about this, I have chosen to see this as an opportunity to take scissors to my knitting OF MY OWN ACCORD. This is big, people.

This particular knitting surgery happens in three parts: cutting the knitting apart, knitting one piece to an appropriate length, and reattaching the two parts together. Here, for your edification, is Part 1: Cutting the Stitches.

First, you will need to locate the section in the garment you are going to lengthen. For my Rogue, this will be in the section after the waist decreases, where the pattern indicates you can repeat the short cable repeat ad nauseum until the piece is an appropriate length. Me? Did not repeat ad nauseum enough. For my little brown swatch, it’s somewhere in the middle.

Secure the stitches above and below the row you will cut apart on. I inserted two needles from right to left into the right-hand side of the loops on the knit side.

Knitting Surgery

If you turn the knitting over at this point, you will see that there are two rows of purl bumps between the needles, both snug up against the needles. This is how you can be sure you have just one row selected to be cut.

Knitting Surgery

This step is not for the faint of heart. Take the scissors to your knitting. Go ahead.

Knitting Surgery

To make things faster, you can snip to within 2 inches of the end of the row, and just pull out all of the little purl curls that result.

Knitting Surgery

Then you can unravel the sections near the ends by pulling on the purl loops one by one and unthreading the center row.

Knitting Surgery

You will end up with two separated pieces of knitting with live stitches at their ends. You’re ready to attach yarn and knit upwards on the bottom piece and then graft the two together with kitchener stitch (Steps 2 and 3)!

Knitting Surgery

Labels:

Monday, October 16, 2006

Gone Rogue

A few months ago, my knitting protege at work and I decided to knit the Rogue sweater together at work. Hers is going to be periwinkle, mine oxblood with turquoise hems.

After a couple "incidents" with the sleeve cabling, and after throwing the whole thing unceremoniously under the couch for a month or so, I'm back at it, and am now halfway up the body (pictures to follow).

I feel infinitely clever for figuring out a better way to knit the kangaroo pocket: rather than knitting the pocket flap and returning to pick up stitches to continue knitting the body and then later grafting the pocket top, I ran two strands of yarn while knitting the pocket stitches - one was the body strand and the other was a new strand for working the pocket. At the end of that run of stitches, I split the paired stitches into front and backs (not really worrying about which individual leg belonged to which ball), putting the set of stitches at the back of the work on the main body cable needle and knit the front set of stitches into the pocket on straights. At the end of the pocket, I put the live stitches on waste yarn and grafted them when I reached the appropriate row in the body work later on. As I hate picking up stitches, I feel just about too clever for words.

I'm almost done with the body cabling charts, have the sleeves already off the needles (having worked them first at the same time on a cable needle as two incredibly painful swatches), and am looking forward with some apprehension at the worked flat portions of the body and hood. I would love to have this done and seamed by the end of the month, and at the rate I've been working at it, I just may!

I've been knitting to Grey's Anatomy on DVD, and fear that I may run out of episodes before the sweater is done, and don't want to contemplate what that will do for my drive.

Oh - the sweater is in Clekheaton Wool superwash in oxblood. I worked the hem facings in a bright turquoise, just for fun. I want to figure out how to work a facing into the hood...

Labels:

Friday, September 22, 2006

She's Crafty, Vol. 1

I made a quilt for my sister's birthday a little while back, greens on chocolate brown cotton, with a chocolate flannel back and pink piping, quilting at random with hot and ballet pink thread:

06-27-06_0841.jpg
(sorry about the crappy photo)

Also, to the dismay of my roommates, I'm working on this one:

09-08-06_1744.jpg

Made from gifted scraps and a thrifted turquoise bedsheet. It needs a fairly large border if it's going to make it to bed-sized. Backing will probably be from the fitted sheet that matches, quilted like the one above.

Day off today, which means some combination of slacking off and madly doing chores, so I'll be getting back to that.

Labels: